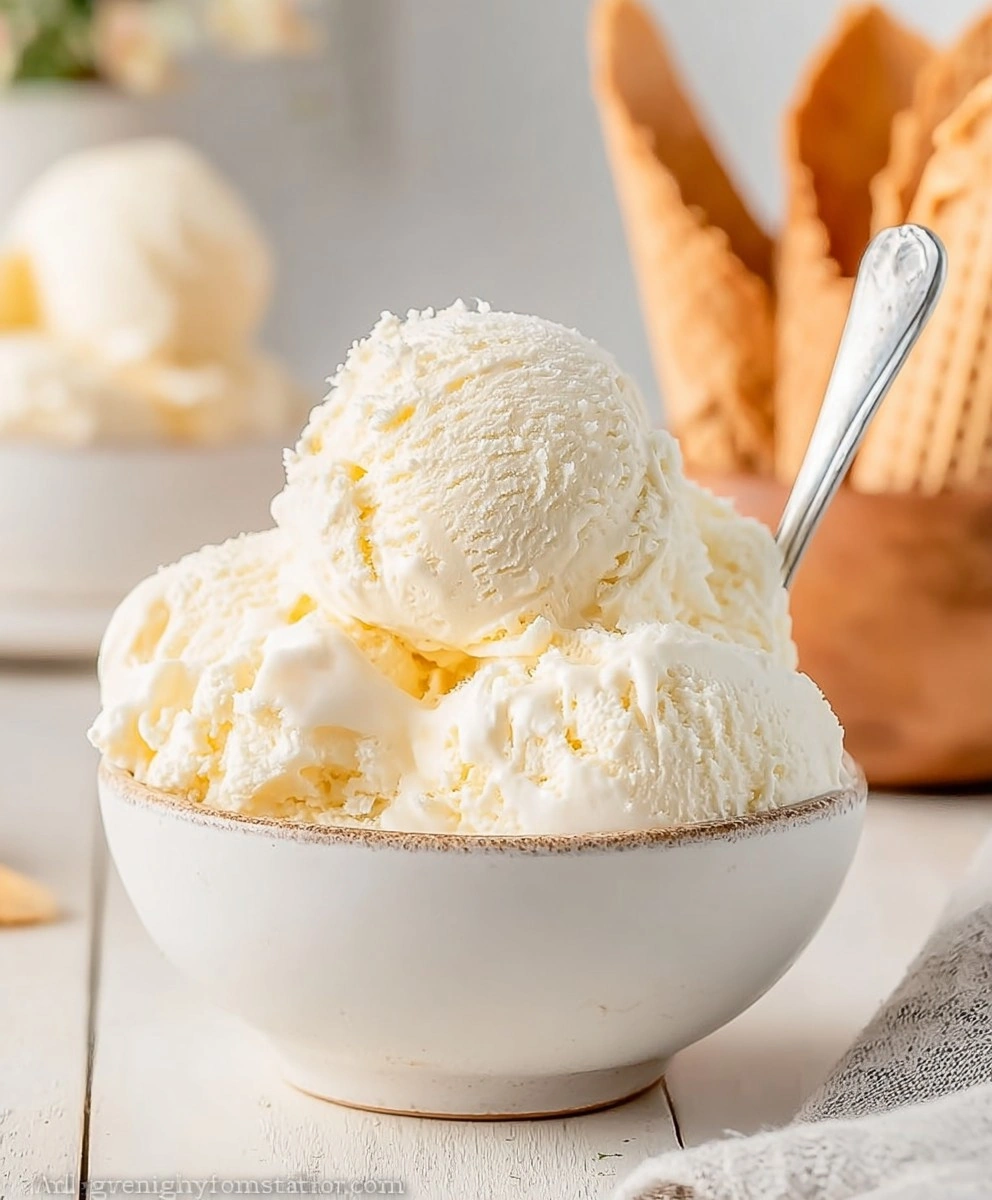
If you’re looking for a delicious and guilt-free dessert to satisfy your sweet tooth, you’ve come to the right place! This Sugar Free Vanilla Ice Cream: The Ultimate Guilt-Free Treat is a must-try. It’s creamy, dreamy, and made with simple ingredients that you probably already have in your kitchen. I love making this ice cream for family gatherings or just to enjoy on a busy weeknight after dinner. It’s the perfect way to indulge without any of the sugar hangovers!
The beauty of this recipe is its simplicity and versatility. You can whip it up in no time and customize it to suit your taste. Whether you’re serving it at a summer barbecue or curling up on the couch with a bowl for movie night, this ice cream is bound to become a favorite in your household.
Why You’ll Love This Recipe
- Easy to Make: With just a few simple steps, you can create a homemade treat that’s ready to enjoy.
- Family-Friendly: Everyone will love this delicious vanilla ice cream—even those who are watching their sugar intake!
- Customizable Flavors: Feel free to get creative! Add in your favorite mix-ins or switch up the flavor profile.
- Perfect for Meal Prep: Make it ahead of time for parties or spontaneous cravings. It’s always nice to have something sweet on hand!
Ingredients You’ll Need
You’ll be delighted to know that this recipe uses simple, wholesome ingredients that are easy to find. Here’s what you need:
For the Base
- 2 cups heavy cream
- 1 cup unsweetened almond milk (or other milk alternative)
- 1 cup erythritol (or your preferred sugar-free sweetener, adjust to taste)
- 1 tablespoon vanilla extract
- 1/4 teaspoon sea salt
Optional Enhancer
- 1/4 teaspoon xanthan gum (for a smoother texture)
Variations
One of the best things about this Sugar Free Vanilla Ice Cream is how flexible it is! You can easily adapt the recipe to match your cravings or dietary needs.
- Add Chocolate Chips: Stir in some sugar-free chocolate chips for an extra indulgent treat!
- Fruit Swirls: Blend in pureed berries or other fruits before churning for a refreshing twist.
- Nutty Flavor: Toss in some chopped nuts for added crunch and flavor.
- Spice It Up: Experiment with spices like cinnamon or nutmeg for a cozy twist on classic vanilla.
How to Make Sugar Free Vanilla Ice Cream: The Ultimate Guilt-Free Treat
Step 1: Combine Cream and Milk
In a medium saucepan, combine the heavy cream and almond milk. This mixture creates the rich base of our ice cream. Using heavy cream ensures that our final product will be super creamy, while almond milk adds lightness.
Step 2: Add Sweetener and Salt
Next, add erythritol (or your chosen sweetener) along with sea salt into the saucepan. The salt enhances all the flavors, making every bite even more enjoyable.
Step 3: Heat and Dissolve
Heat the mixture over medium heat while stirring constantly until all the sweetener dissolves completely—this should take about 5-7 minutes. It’s important not to let it boil; we just want everything nicely combined!
Step 4: Incorporate Vanilla Extract
Remove the saucepan from heat and stir in that lovely vanilla extract. This is where all that wonderful vanilla flavor comes from, making your ice cream truly delightful!
Step 5: Add Xanthan Gum (Optional)
If you’re using xanthan gum for an even smoother texture, now’s the time to whisk it in until dissolved. This step is optional but recommended if you want that creamy consistency.
Step 6: Chill the Mixture
Pour your ice cream base into a container and let it cool down to room temperature first. Then cover and refrigerate for at least 4 hours—or overnight if you can wait! Chilling helps develop flavors and ensures it’s nice and cold when ready for churning.
Step 7: Prepare Ice Cream Maker
Make sure your ice cream maker bowl is frozen as per manufacturer instructions—this usually takes about 15-24 hours before you start making ice cream.
Step 8: Pour Chilled Base
Once chilled, give your ice cream base a good stir before pouring it into the frozen bowl of your ice cream maker. This ensures an even consistency throughout.
Step 9: Churn
Turn on your ice cream maker and churn according to manufacturer instructions—typically around 20-30 minutes—until it reaches that soft-serve consistency we all love.
Step 10: Transfer to Freezer-Safe Container
Carefully transfer your churned ice cream into a freezer-safe container. Make sure it’s sealed well so that no air gets in!
Step 11: Firm Up in the Freezer
Place the container in your freezer and allow it to firm up for at least 2-3 hours (or longer if you prefer a firmer texture). Patience pays off here!
Step 12: Serving and Storage
When you’re ready to serve, let the ice cream sit at room temperature for a few minutes so it softens slightly—it makes scooping much easier! Any leftovers can be stored in the freezer for up to two weeks, although I doubt there will be any left! Enjoy!
Pro Tips for Making Sugar Free Vanilla Ice Cream: The Ultimate Guilt-Free Treat
Making your own sugar-free ice cream can be a delightful experience, and these tips will help you achieve the best results!
-
Use a high-quality sweetener: Opting for erythritol or another preferred sugar-free sweetener is crucial as it mimics the sweetness of sugar without the calories. Each sweetener has its unique taste, so feel free to experiment until you find your favorite.
-
Chill your mixture thoroughly: Allowing the ice cream base to chill overnight not only enhances the flavor but also ensures that it churns better in the ice cream maker, resulting in a creamier texture.
-
Keep your ice cream maker bowl frozen: Make sure to follow your manufacturer’s instructions for freezing the bowl. A properly chilled bowl is essential for achieving that perfect soft-serve consistency.
-
Don’t skip the xanthan gum (if desired): This optional ingredient can greatly improve the texture of your ice cream by preventing ice crystals from forming, leading to a smoother and more enjoyable treat.
-
Let it soften before serving: Allowing your ice cream to sit at room temperature for a few minutes before serving makes scooping easier and enhances the overall flavor experience.
How to Serve Sugar Free Vanilla Ice Cream: The Ultimate Guilt-Free Treat
When it comes to serving your homemade sugar-free vanilla ice cream, presentation is key! Here are some creative ideas to make each scoop even more enticing.
Garnishes
- Fresh berries: Strawberries, blueberries, or raspberries add a burst of natural sweetness and color, enhancing both flavor and visual appeal.
- Chopped nuts: A sprinkle of almonds or walnuts provides a delightful crunch that contrasts beautifully with the creamy texture.
- Coconut flakes: Toasted or untoasted coconut adds a tropical twist and an extra layer of flavor that perfectly complements vanilla.
Side Dishes
- Fruit salad: A refreshing mix of seasonal fruits pairs wonderfully with vanilla ice cream. The natural juices from the fruits create an irresistible combination.
- Dark chocolate sauce: A drizzle of sugar-free dark chocolate sauce elevates your dessert experience with rich flavors that harmonize beautifully with vanilla.
- Granola: Crunchy granola not only adds texture but also enhances the healthiness of your dessert, making it feel like a decadent yet nutritious choice.
- Homemade cookies: Pairing a scoop of ice cream with warm sugar-free cookies creates a comforting and indulgent treat perfect for any occasion.
Now you have all the tools and inspiration needed to enjoy your sugar-free vanilla ice cream! Whether it’s simply served on its own or dressed up with garnishes and sides, this guilt-free treat is sure to please everyone. Enjoy every delicious bite!
Make Ahead and Storage
This Sugar Free Vanilla Ice Cream recipe is perfect for meal prep, allowing you to have a delicious treat ready whenever you need one. It’s easy to make in advance and store for later enjoyment.
Storing Leftovers
- Store any leftover ice cream in an airtight container to prevent freezer burn.
- Keep the ice cream in the freezer for up to 2 weeks.
- If you notice any ice crystals forming, simply stir the ice cream before serving.
Freezing
- Make sure to transfer the churned ice cream into a freezer-safe container promptly after churning.
- Press a piece of parchment paper directly on top of the ice cream before sealing with a lid to minimize air exposure.
- Allow the ice cream to firm up for at least 2-3 hours in the freezer before enjoying.
Reheating
- If your ice cream is too hard, let it sit at room temperature for about 5-10 minutes before scooping.
- You can also microwave individual servings for about 10 seconds if you’re in a hurry, but be careful not to melt it!
FAQs
Here are some common questions about this delightful recipe.
Can I make Sugar Free Vanilla Ice Cream without an ice cream maker?
Yes! You can make Sugar Free Vanilla Ice Cream without an ice cream maker. Simply mix all ingredients well, pour into a container, and freeze. Stir every 30 minutes until fully frozen to achieve a creamy texture.
How does Sugar Free Vanilla Ice Cream taste compared to regular ice cream?
Sugar Free Vanilla Ice Cream tastes just as delicious as regular ice cream! The use of sugar-free sweeteners like erythritol allows you to enjoy the sweet flavors without the extra sugar, making it a guilt-free treat.
What are some topping ideas for Sugar Free Vanilla Ice Cream?
You can top your Sugar Free Vanilla Ice Cream with fresh berries, chopped nuts, or a drizzle of sugar-free chocolate sauce. Get creative with your favorite toppings!
How long does Sugar Free Vanilla Ice Cream last in the freezer?
This treat will last in the freezer for up to 2 weeks if stored properly in an airtight container. Just remember that homemade varieties may develop ice crystals over time.
Final Thoughts
I hope you find joy in making this Sugar Free Vanilla Ice Cream: The Ultimate Guilt-Free Treat! It’s a wonderful way to satisfy your sweet cravings while keeping things healthy. Enjoy experimenting with flavors and toppings; I’d love to hear how yours turns out! Happy churning!
Sugar Free Vanilla Ice Cream: The Ultimate Guilt-Free Treat
- Prep Time: 15 minutes
- Cook Time: 7 minutes
- Total Time: 22 minutes
- Category: Main
- Method: Cooking
- Cuisine: International
Ingredients
- 2 cups heavy cream
- 1 cup unsweetened almond milk
- 1 cup erythritol (or preferred sugar-free sweetener)
- 1 tablespoon vanilla extract
- 1/4 teaspoon sea salt
- Optional: 1/4 teaspoon xanthan gum (for smoother texture)
- Instructions:
Instructions
- In a medium saucepan, combine heavy cream and almond milk.
- Add erythritol and sea salt; heat over medium until dissolved.
- Stir in vanilla extract and xanthan gum (if using).
- Chill the mixture in the refrigerator for at least 4 hours.
- Pour into a chilled ice cream maker and churn per manufacturer instructions (about 20-30 minutes).
- Transfer to a freezer-safe container and freeze for 2-3 hours before serving.
- Helpful Notes:
Nutrition
- Serving Size: 1/2 cup (120g)
- Calories: 160
- Sugar: 0g
- Sodium: 60mg
- Fat: 15g
- Saturated Fat: 9g
- Unsaturated Fat: 6g
- Trans Fat: 0g
- Carbohydrates: 8g
- Fiber: 0g
- Protein: 2g
- Cholesterol: 50mg
Leave a Comment