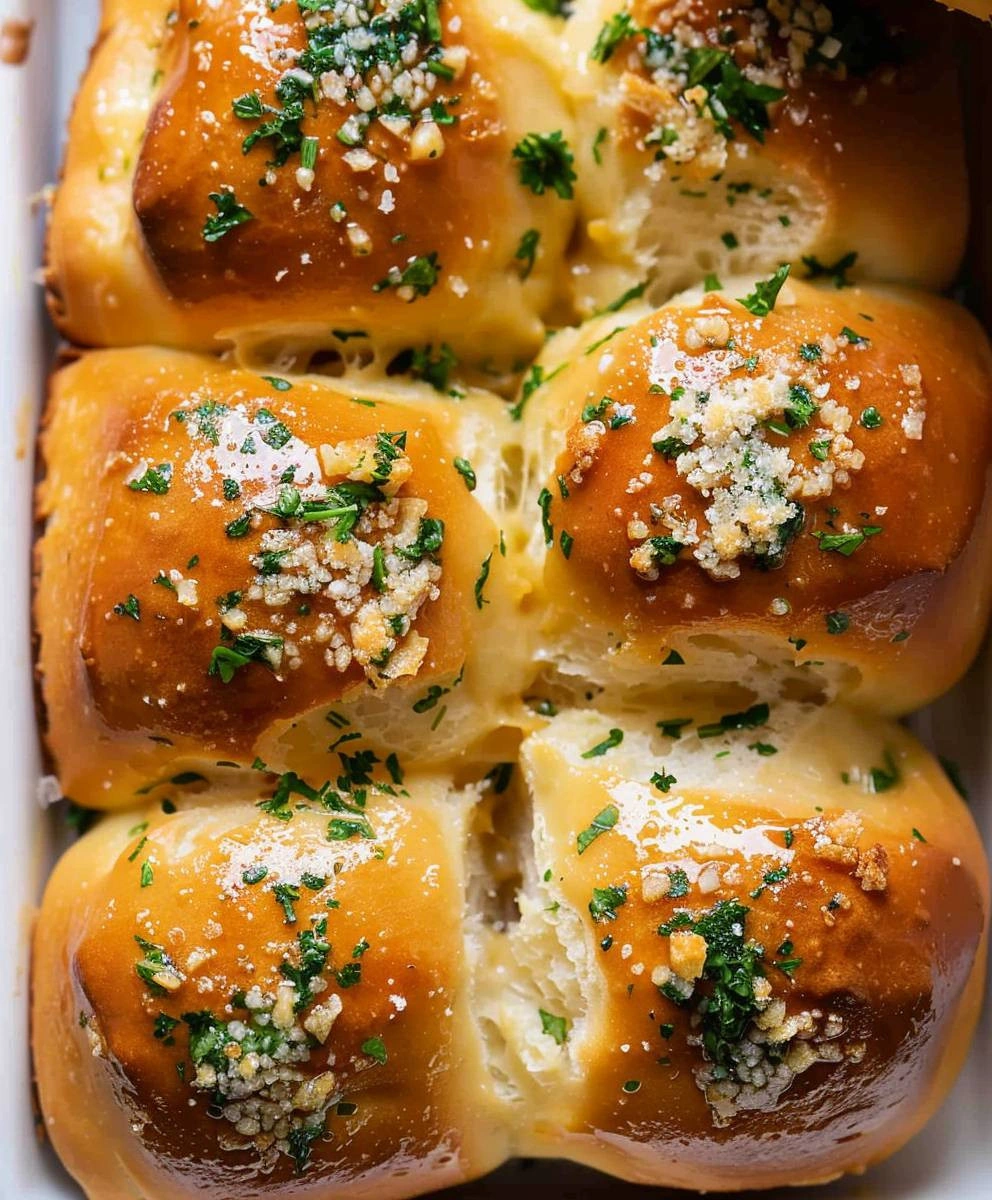
If you’re looking for the perfect side dish that complements just about any meal, you’ve come to the right place! Garlic Butter Bread: The Ultimate Guide to Making It Perfect is more than just a recipe; it’s an invitation to create a warm and delicious experience in your kitchen. This garlic bread is fluffy, buttery, and bursting with flavor. It’s perfect for busy weeknights when you need something quick or family gatherings where everyone will be reaching for seconds!
What makes this recipe so special? Well, it’s simple enough for any cook yet sophisticated enough to impress your guests. Whether you’re enjoying a cozy evening in or hosting a festive dinner, this garlic butter bread will surely be a hit.
Why You’ll Love This Recipe
- Quick and Easy: With just 15 minutes of prep time, you’ll have a delicious side dish ready in no time.
- Family Favorite: Garlic bread is loved by all ages, making it a great addition to any meal.
- Flexible Recipe: You can easily customize the flavors to match your family’s tastes or dietary needs.
- Make Ahead Convenience: Prepare the garlic butter mixture ahead of time and store it in the fridge until you’re ready to bake!
- Irresistibly Delicious: The combination of garlic and butter creates an aroma that fills your kitchen and makes everyone hungry!
Ingredients You’ll Need
Let’s gather our simple, wholesome ingredients! You probably have most of these items already in your pantry. Here’s what you’ll need to make this delightful garlic butter bread:
- 1 loaf of Italian or French bread (about 16-20 inches long)
- 1 cup (2 sticks) unsalted butter, softened
- 6-8 cloves garlic, minced
- 1/4 cup fresh parsley, chopped
- 1/4 cup grated Parmesan cheese
- 1/4 teaspoon garlic powder (optional)
- 1/4 teaspoon onion powder (optional)
- Pinch of red pepper flakes (optional)
- Salt and freshly ground black pepper to taste
Variations
One of the best things about garlic butter bread is how adaptable it is! Here are a few fun variations you can try:
- Add Herbs: Mix in other fresh herbs like basil or oregano for an herby twist.
- Spicy Kick: Toss in some chopped jalapeños or switch out the red pepper flakes for a little extra heat.
- Cheesy Goodness: Swap out Parmesan for mozzarella cheese for gooey, cheesy bites.
- Gluten-Free Option: Use gluten-free bread for those with dietary restrictions.
How to Make Garlic Butter Bread: The Ultimate Guide to Making It Perfect
Step 1: Soften the Butter
Make sure your butter is nice and soft. You can leave it out at room temperature for a couple of hours. If you’re in a hurry, microwave it in short bursts of 10 seconds until it’s softened but not melted. Softened butter spreads easily and ensures that every bite is full of flavor.
Step 2: Mince the Garlic
Mince the garlic as finely as possible. This step is important because finely minced garlic releases its oils better, giving you that rich garlic flavor throughout the bread.
Step 3: Combine the Ingredients
In a medium bowl, combine the softened butter, minced garlic, chopped parsley, Parmesan cheese, garlic powder (if using), onion powder (if using), and red pepper flakes (if using). Mixing these ingredients together creates that heavenly garlic butter spread we all love.
Step 4: Season and Mix
Season your mixture with salt and freshly ground black pepper to taste. It’s crucial to taste as you go; seasoning enhances all those lovely flavors!
Step 5: Cream the Butter
Using a fork or rubber spatula, thoroughly mix all ingredients together until the butter becomes light and fluffy. This step ensures that every bite has an even distribution of those delicious flavors.
Step 6: Preheat the Oven
Preheat your oven to 375°F (190°C). Preheating is essential for achieving that perfect golden crust on your bread.
Step 7: Slice the Bread
Using a serrated bread knife, slice your loaf lengthwise. You can either cut it completely in half or almost all the way through—leaving a small hinge at the bottom keeps everything intact while baking!
Step 8: Optional – Score the Bread
If you chose to cut the loaf completely in half, lightly score the cut sides of the bread in a diamond pattern. Scoring allows more surface area for that delicious garlic butter to soak into.
Step 9: Generously Spread the Butter
With a butter knife or spatula, generously spread that glorious garlic butter mixture over both cut sides of the bread. Don’t be shy—get every nook and cranny covered!
Step 10: Optional – Add More Parmesan
For those who adore cheese as much as I do, sprinkle some extra Parmesan cheese over the top of your buttered bread before baking.
Step 11: Place on Baking Sheet
Transfer your buttered bread onto a baking sheet lined with parchment paper for easy cleanup later on.
Step 12: Bake
Pop it into your preheated oven and bake for about 12-15 minutes. Keep an eye on it until it turns golden brown and bubbly—this is when magic happens!
Step 13: Broil (Optional)
For an extra crispy top finish, broil your bread for about one to two minutes at the end of baking. Just watch closely; things can go from perfect to burnt very quickly under high heat!
Step 14: Remove from Oven
Carefully take out your baking sheet from the oven—those aromas should be wafting through your kitchen right about now!
Step 15: Let Cool Slightly
Allow it to cool for just a few minutes before slicing into individual pieces. This helps prevent burns while still keeping everything warm.
Step 16: Slice and Serve
If you used the hinged method, simply pull apart those slices! For halved loaves, slice into individual pieces that are easy to grab.
Step 17: Garnish (Optional)
For an added touch of color and freshness, garnish with a sprinkle of chopped parsley right before serving.
Step 18: Serve Immediately
Serve this delectable garlic butter bread hot from the oven! It’s best enjoyed fresh while still warm and crispy—a guaranteed crowd pleaser!
Pro Tips for Making Garlic Butter Bread: The Ultimate Guide to Making It Perfect
Making garlic butter bread is a delightful experience, and with these simple tips, your creation will be even more scrumptious and memorable!
-
Use Fresh Ingredients: Opting for fresh garlic and herbs instead of dried ones will enhance the flavor profile significantly. Fresh ingredients bring out the best taste, making your garlic butter bread irresistible.
-
Experiment with Flavors: Don’t hesitate to add your favorite herbs or spices to the butter mixture. Basil, oregano, or even a sprinkle of lemon zest can add an exciting twist to classic garlic bread.
-
Adjust the Garlic Level: If you’re unsure about how garlicky you want your bread, start with fewer cloves and taste as you mix. You can always add more if needed, ensuring it suits your palate perfectly.
-
Keep an Eye on Baking Time: Ovens can vary; keep a close watch on your bread as it bakes. The goal is a golden brown finish without burning, so check at the lower end of the time range.
-
Let it Cool Down Before Serving: Allowing the bread to cool slightly before serving helps maintain its structure and makes it easier to slice. This also prevents burns from hot melted butter!
How to Serve Garlic Butter Bread: The Ultimate Guide to Making It Perfect
Presenting your garlic butter bread can be as enjoyable as making it! Here are some creative ways to serve this delicious dish that will impress your family and friends.
Garnishes
- Fresh Parsley: A sprinkle of freshly chopped parsley adds a burst of color and freshness that enhances both appearance and flavor.
- Chili Flakes: For those who enjoy a kick, a dash of chili flakes on top not only looks appealing but gives an extra layer of spiciness.
- Lemon Zest: Grating a little lemon zest over the finished product offers a refreshing contrast to the richness of the butter.
Side Dishes
- Caesar Salad: Crisp romaine lettuce tossed with creamy dressing and crunchy croutons complements the rich flavors of garlic butter bread beautifully.
- Tomato Soup: A warm bowl of tomato soup pairs perfectly with garlic butter bread, creating a comforting meal that’s ideal for any time of year.
- Grilled Vegetables: Seasoned grilled veggies such as zucchini, bell peppers, and asparagus provide a healthy contrast that balances the richness of the bread.
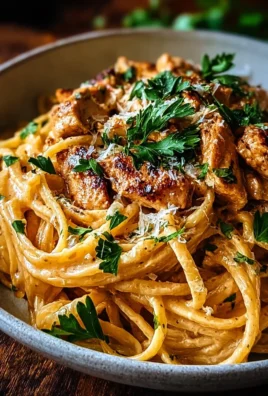
- Pasta Primavera: A light pasta dish filled with seasonal vegetables is another delightful option that pairs wonderfully with garlic butter bread for an Italian-inspired feast.

Make Ahead and Storage
This garlic butter bread is not only delicious but also perfect for meal prep! You can make it ahead of time and store it for later enjoyment. Here’s how to keep your garlic butter bread fresh and tasty.
Storing Leftovers
- Store any leftover garlic butter bread in an airtight container at room temperature for up to 2 days.
- For longer storage, wrap the bread tightly in plastic wrap or aluminum foil, then place it in a resealable bag.
Freezing
- To freeze, slice the bread first. Wrap each piece individually in plastic wrap, then place them in a freezer-safe bag.
- Label the bag with the date and use within 1-2 months for the best flavor.
Reheating
- To reheat from room temperature, simply pop the slices back into a preheated oven at 375°F (190°C) for about 5-7 minutes until warm.
- If frozen, let them thaw in the fridge overnight, then reheat as above or microwave for about 10-15 seconds per slice until warmed through.
FAQs
Here are some common questions you might have about making garlic butter bread.
Can I use different types of bread for Garlic Butter Bread: The Ultimate Guide to Making It Perfect?
Absolutely! While Italian and French breads are classic choices, you can also use ciabatta, sourdough, or even whole grain bread. Each type will give a unique twist to your garlic butter bread.
How can I make my Garlic Butter Bread: The Ultimate Guide to Making It Perfect extra flavorful?
To enhance the flavor, consider adding herbs like oregano or basil to your garlic butter mixture. You can also experiment with different cheeses like mozzarella or cheddar instead of Parmesan for a different taste profile.
Can I make this recipe vegan?
Yes! Simply substitute the unsalted butter with a plant-based butter alternative and omit the Parmesan cheese or replace it with a vegan cheese option.
What should I serve with Garlic Butter Bread?
Garlic butter bread pairs wonderfully with pasta dishes, soups, salads, or as an appetizer at parties. It’s versatile and complements many meals beautifully!
Final Thoughts
I hope this garlic butter bread recipe brings warmth and joy to your kitchen! It’s such a special treat that elevates any meal. Whether you’re serving it as an appetizer or alongside your favorite dishes, this recipe is sure to impress family and friends alike. Enjoy making it, savor those delicious flavors, and don’t hesitate to share your experiences—happy baking!
Garlic Butter Bread: The Ultimate Guide to Making It Perfect

- Prep Time: 15 minutes
- Cook Time: 15 minutes
- Total Time: 30 minutes
- Category: Main
- Method: Cooking
- Cuisine: International
Ingredients
- 1 loaf of Italian or French bread (16–20 inches)
- 1 cup (2 sticks) unsalted butter, softened
- 6–8 cloves garlic, minced
- 1/4 cup fresh parsley, chopped
- 1/4 cup grated Parmesan cheese
- Salt and freshly ground black pepper to taste
- Preparation Instructions:
Instructions
- Soften the butter until creamy.
- Mince garlic finely for optimal flavor.
- In a bowl, combine softened butter, minced garlic, parsley, Parmesan cheese, salt, and pepper.
- Preheat oven to 375°F (190°C).
- Slice the bread lengthwise; spread the butter mixture generously on both sides.
- Place on a baking sheet and bake for 12-15 minutes until golden brown.
- Optional: Broil for an extra crispy finish.
- Helpful Notes:
Nutrition
- Serving Size: 1 slice (approx. 45g)
- Calories: 223
- Sugar: 0g
- Sodium: 345mg
- Fat: 21g
- Saturated Fat: 12g
- Unsaturated Fat: 7g
- Trans Fat: 0g
- Carbohydrates: 14g
- Fiber: <1g
- Protein: 3g
- Cholesterol: 31mg


Leave a Comment