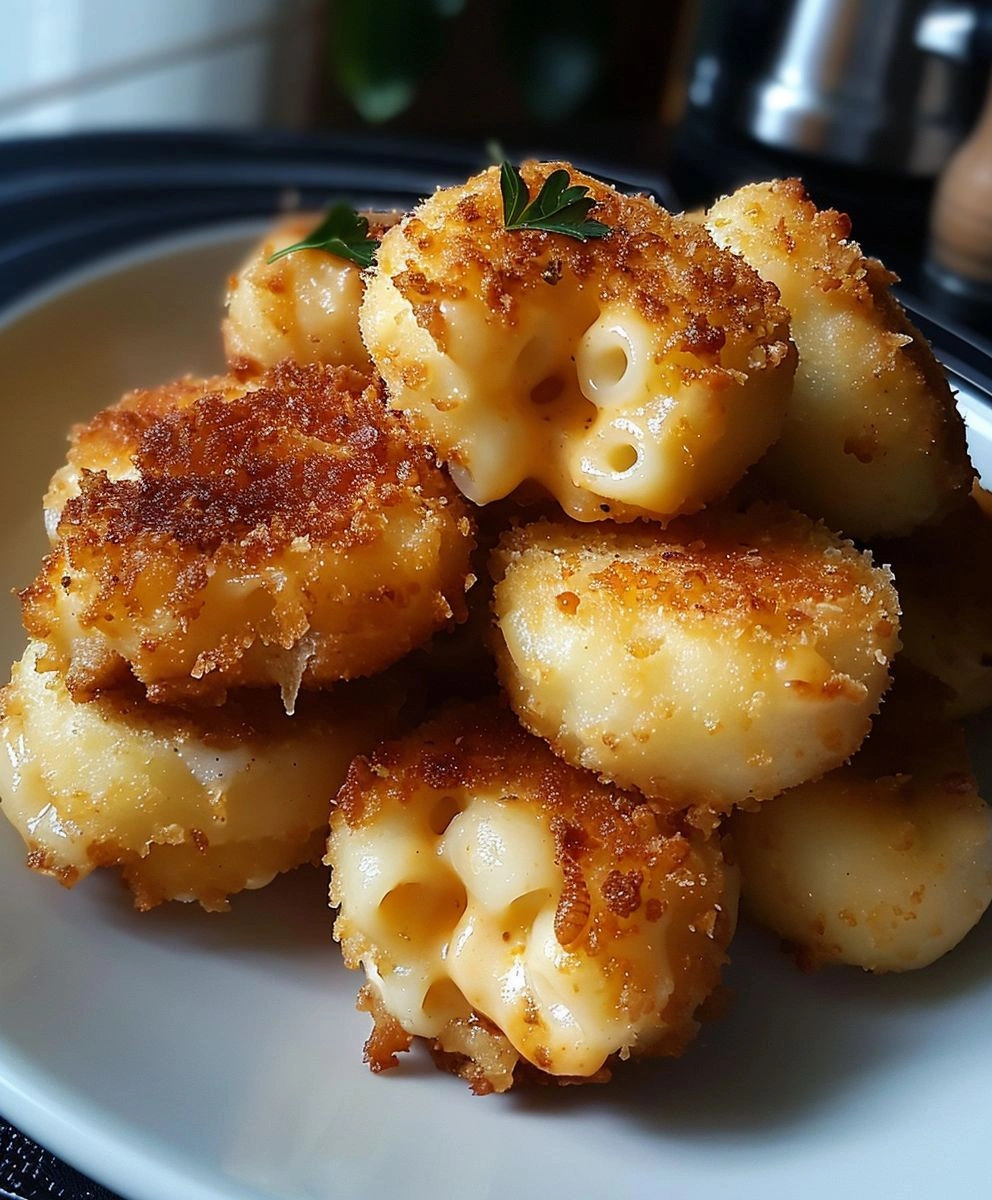
If you’re looking for a fun and delicious snack that will make your taste buds dance with joy, you’ve come to the right place! Fried Mac and Cheese Bites are the ultimate comfort food—crispy on the outside and creamy on the inside. This recipe is perfect for busy weeknights, casual family gatherings, or even game day celebrations. Trust me, once you make these cheesy bites, they’ll become a beloved favorite in your home!
There’s something truly special about sharing these golden-brown treasures with friends and family. They not only taste amazing but also bring everyone together in the kitchen for some fun cooking moments. So roll up your sleeves and let’s dive into this delightful adventure of crispy, cheesy perfection!
Why You’ll Love This Recipe
- Easy to Make: With simple steps, you’ll have these tasty bites ready in no time!
- Family-Friendly: Kids and adults alike will love this cheesy treat—perfect for all ages!
- Make Ahead Convenience: You can prepare them in advance and freeze them until you’re ready to fry.
- Flavor Packed: The blend of cheeses and spices makes every bite irresistible!
- Perfect for Any Occasion: Whether it’s a snack or an appetizer, these bites fit right in at any gathering.
Ingredients You’ll Need
Gathering these ingredients is a breeze! You’ll find that they are all simple and wholesome, making it easy to whip up this delightful dish anytime.
For the Mac and Cheese
- 1 pound elbow macaroni
- 1/2 cup (1 stick) unsalted butter
- 1/2 cup all-purpose flour
- 3 cups whole milk
- 1 teaspoon salt
- 1/2 teaspoon black pepper
- 1/4 teaspoon ground nutmeg
- 4 cups (about 1 pound) shredded cheddar cheese, divided
- 1 cup shredded Gruyere cheese
- 1/2 cup grated Parmesan cheese
For Bread Crumbing
- 2 large eggs
- 1/4 cup milk
- 1 cup all-purpose flour
- 2 cups panko breadcrumbs
- 1 teaspoon garlic powder
- 1 teaspoon onion powder
- 1/2 teaspoon paprika
- 1/4 teaspoon cayenne pepper (optional, for a little kick!)
- Salt and pepper to taste
For Frying
- Vegetable oil, for frying (about 4-6 cups, depending on your pot)
Variations
This recipe is wonderfully flexible! You can easily customize it to suit your taste or dietary needs.
- Add Some Veggies: Mix in some cooked spinach or diced jalapeños into the mac and cheese for an extra kick.
- Change Up the Cheese: Try different cheese combinations like mozzarella or pepper jack for a unique flavor twist.
- Spice It Up: Add more cayenne pepper or some chopped fresh herbs to enhance the flavor profile.
- Make It Gluten-Free: Substitute regular flour with gluten-free all-purpose flour and use gluten-free panko breadcrumbs.
How to Make Fried Mac and Cheese Bites: The Ultimate Guide to Crispy, Cheesy Perfection
Step 1: Cook the Macaroni
Start by bringing a large pot of salted water to a boil. Add your elbow macaroni and cook according to package directions—this is usually about 8-10 minutes until it’s nice and al dente. Once done, drain well and set aside. Cooking it properly now ensures each bite has just the right texture later!
Step 2: Make the Roux
In that same pot (no need for extra dishes here!), melt your butter over medium heat. Whisk in the flour, cooking for about 1-2 minutes until it turns a light golden color. This roux is essential as it helps thicken our cheese sauce later on.
Step 3: Add the Milk
Now it’s time to gradually whisk in the milk—do it about half a cup at a time. This step is crucial; you want each addition fully incorporated before adding more. Keep whisking until the sauce is smooth and starts to thicken (this should take around 5-7 minutes).
Step 4: Season the Sauce
Stir in your salt, black pepper, and ground nutmeg. Give it a taste test! Adjusting seasonings now ensures that every bite will be packed with flavor.
Step 5: Melt the Cheese
Reduce your heat to low and slowly add 3 cups of cheddar cheese while stirring constantly—this melting process makes our sauce creamy! After that’s melted, throw in Gruyere and Parmesan cheeses too until everything’s blended beautifully.
Step 6: Combine Macaroni and Cheese Sauce
Once your macaroni is cooked perfectly, add it directly into that luscious cheese sauce we just made. Stir until every piece of pasta is coated with cheesy goodness.
Step 7: Cool and Refrigerate
Pour everything into a greased 9×13 inch baking dish. Spread it out evenly then cover tightly with plastic wrap pressed onto its surface (this prevents any skin from forming). Pop it in the fridge for at least four hours—or overnight if you can wait!
Step 8: Prepare the Egg Wash
In a shallow dish, whisk together your eggs with the milk until smooth. This egg wash will help our breading stick perfectly!
Step 9: Prepare the Flour Mixture
Grab another shallow dish for your all-purpose flour. This will be where we coat our mac and cheese squares first before dipping them into egg wash.
Step 10: Prepare the Breadcrumb Mixture
Combine panko breadcrumbs with garlic powder, onion powder, paprika, cayenne pepper (if using), salt, and pepper in another shallow dish. Mixing these spices ensures every bite has fantastic flavor!
Step 11: Cut the Mac and Cheese
Remove that chilled mac and cheese from refrigeration. Using a sharp knife, cut it into nice even squares—about one inch each works well.
Step 12: Breading Process
Now comes the fun part! Take each square:
First dredge it in flour so it’s fully coated then shake off any excess.
Second dip it into egg wash; make sure it’s submerged completely before letting excess drip off.
Third coat thoroughly in panko breadcrumb mixture by pressing gently so they stick well.
Repeat Steps
Repeat this breading process until all squares are nicely coated! Place them on a parchment-lined baking sheet as you go along.
Chill Again (Optional but Recommended)
For best results—and who doesn’t want those?—place those breaded mac and cheese bites in the freezer for about 30 minutes before frying. This helps them hold their shape when frying!
Step 18: Heat the Oil
Pour vegetable oil into your deep pot or Dutch oven. Heat over medium-high heat until it reaches between 350-375°F (175-190°C)—a thermometer will help here!
Step 19: Fry in Batches
Carefully add those breaded mac and cheese bites into hot oil but do it in batches; overcrowding will lower oil temperature which means soggy bites!
Step 20: Fry Until Golden Brown
Fry each batch for about 2-3 minutes per side until they’re golden brown! Keep an eye on them because nobody likes burnt snacks.
Step 21: Drain on Paper Towels
Once they’re golden perfection, use a slotted spoon or spider to remove them from oil onto paper towels placed on plates; this drains excess oil away nicely.
Step 22: Serve Immediately
Serve up those fried mac and cheese bites while they’re hot—trust me; they’re best enjoyed fresh out of that fryer!
And there you have it—a warm hug of cheesy goodness wrapped up in crispy bites! Enjoy sharing (or keeping them all to yourself) this delightful treat!
Pro Tips for Making Fried Mac and Cheese Bites: The Ultimate Guide to Crispy, Cheesy Perfection
Creating the perfect fried mac and cheese bites is all about technique and a little bit of patience—follow these tips to ensure your bites are crispy on the outside and creamy on the inside!
-
Chill the Mac and Cheese: Allowing your mac and cheese to cool in the fridge for several hours (or overnight) helps it firm up, making it easier to cut into squares and preventing it from falling apart during frying.
-
Use Panko Breadcrumbs: Panko breadcrumbs provide an extra crunch compared to regular breadcrumbs. Their larger size allows for more air pockets, resulting in a light and crispy coating.
-
Fry at the Right Temperature: Maintaining an oil temperature between 350-375°F (175-190°C) ensures that the bites fry quickly without absorbing too much oil. Use a thermometer for accuracy!
-
Don’t Overcrowd the Pot: Frying too many bites at once can lower the oil temperature, leading to soggy results. Fry in small batches for consistent crispiness.
-
Serve Fresh: These bites are best enjoyed right after frying when they’re piping hot. If you need to keep them warm, place them in a single layer on a baking sheet in a low oven until ready to serve.
How to Serve Fried Mac and Cheese Bites: The Ultimate Guide to Crispy, Cheesy Perfection
Presentation is key when serving fried mac and cheese bites! With their golden exterior and cheesy interior, these bites can be both a casual snack or an elegant appetizer depending on how you serve them.
Garnishes
- Chopped Fresh Herbs: Sprinkle some chopped parsley or chives over your bites for a pop of color and freshness.
- Dollop of Sour Cream or Yogurt: A creamy topping adds a tangy contrast that complements the rich flavors of the cheese.
- Hot Sauce Drizzle: For those who love a kick, drizzle some hot sauce over the bites for an added burst of flavor.
Side Dishes
- Crunchy Salad: A simple green salad with mixed greens, cherry tomatoes, and a light vinaigrette adds freshness that balances the richness of the mac and cheese bites.
- Veggie Platter: Pair with a colorful assortment of fresh vegetables like carrots, celery, and bell peppers along with hummus or ranch dressing for dipping.
- Sweet Potato Fries: The sweet flavor of sweet potato fries contrasts beautifully with the savory mac and cheese bites while adding another layer of texture to your meal.
- Coleslaw: A tangy coleslaw provides crunch and acidity that pairs perfectly with the cheesy richness of the bites.
Now you’re all set to enjoy these delicious fried mac and cheese bites! Whether you’re serving them at a party or enjoying them as a cozy snack at home, they’re sure to be a hit. Happy cooking!
Make Ahead and Storage
These Fried Mac and Cheese Bites are perfect for meal prep! You can whip up a batch in advance, making them an ideal snack or appetizer for gatherings. Here’s how to store, freeze, and reheat them to maintain their deliciousness.
Storing Leftovers
- Place any leftover fried mac and cheese bites in an airtight container.
- Store them in the refrigerator for up to 3 days.
- To keep them crispy, place a paper towel at the bottom of the container to absorb excess moisture.
Freezing
- Lay the breaded (but un-fried) mac and cheese bites on a baking sheet in a single layer.
- Freeze them until solid, about 1-2 hours.
- Transfer the frozen bites to a resealable plastic bag or airtight container. They can be stored in the freezer for up to 2 months.
Reheating
- For best results, reheat fried mac and cheese bites in an oven preheated to 375°F (190°C) for about 10-15 minutes until hot and crispy.
- Alternatively, you can re-fry them in hot oil for about 2 minutes if you prefer that freshly fried texture.
FAQs
Here are some common questions you might have about making these delightful bites.
Can I make Fried Mac and Cheese Bites ahead of time?
Absolutely! You can prepare the mac and cheese bites ahead of time, refrigerate or freeze them, then fry them right before serving. This makes them a convenient option for parties!
What is the best way to store leftovers of Fried Mac and Cheese Bites?
Store leftover Fried Mac and Cheese Bites in an airtight container in the refrigerator for up to 3 days. For longer storage, freeze them before frying!
How do I ensure my Fried Mac and Cheese Bites stay crispy?
To keep your Fried Mac and Cheese Bites crispy after frying, drain them well on paper towels. You can also reheat them in the oven rather than the microwave to maintain that crunch!
Can I use different cheeses for my Fried Mac and Cheese Bites?
Yes! Feel free to experiment with different cheeses like mozzarella or pepper jack. Just remember to balance flavors so they blend well together.
What dipping sauces go well with Fried Mac and Cheese Bites?
These bites pair wonderfully with marinara sauce, ranch dressing, or even a spicy aioli. Choose your favorite or mix it up!
Final Thoughts
I hope you enjoy making these Fried Mac and Cheese Bites as much as I do! They are not only delicious but also bring a sense of joy when shared with friends and family. Perfect for game day or any gathering, these cheesy delights are sure to impress everyone at your table. Happy cooking, and don’t forget to savor every crispy bite!
Fried Mac and Cheese Bites: The Ultimate Guide to Crispy, Cheesy Perfection

- Prep Time: 30 minutes
- Cook Time: 15 minutes
- Total Time: 45 minutes
- Category: Main
- Method: Cooking
- Cuisine: International
Ingredients
- 1 pound elbow macaroni
- 1/2 cup unsalted butter
- 1/2 cup all-purpose flour
- 3 cups whole milk
- 4 cups shredded cheddar cheese
- 1 cup shredded Gruyere cheese
- 2 large eggs
- 2 cups panko breadcrumbs
- Vegetable oil for frying
- Preparation Instructions:
Instructions
- Cook elbow macaroni in salted water until al dente; drain and set aside.
- In a pot, melt butter over medium heat, whisk in flour to create a roux.
- Gradually add milk while whisking until smooth and thickened.
- Season with salt, pepper, and nutmeg; then stir in cheeses until melted.
- Combine cooked macaroni with cheese sauce; pour into a greased dish and refrigerate for at least 4 hours.
- Cut chilled mac and cheese into squares. Dredge each square in flour, dip in egg wash, then coat in panko breadcrumbs.
- Freeze for 30 minutes before frying in hot oil until golden brown.
- Helpful Notes:
Nutrition
- Serving Size: 3 bites (90g)
- Calories: 280
- Sugar: 3g
- Sodium: 450mg
- Fat: 16g
- Saturated Fat: 9g
- Unsaturated Fat: 5g
- Trans Fat: 0g
- Carbohydrates: 26g
- Fiber: 1g
- Protein: 10g
- Cholesterol: 120mg


Leave a Comment