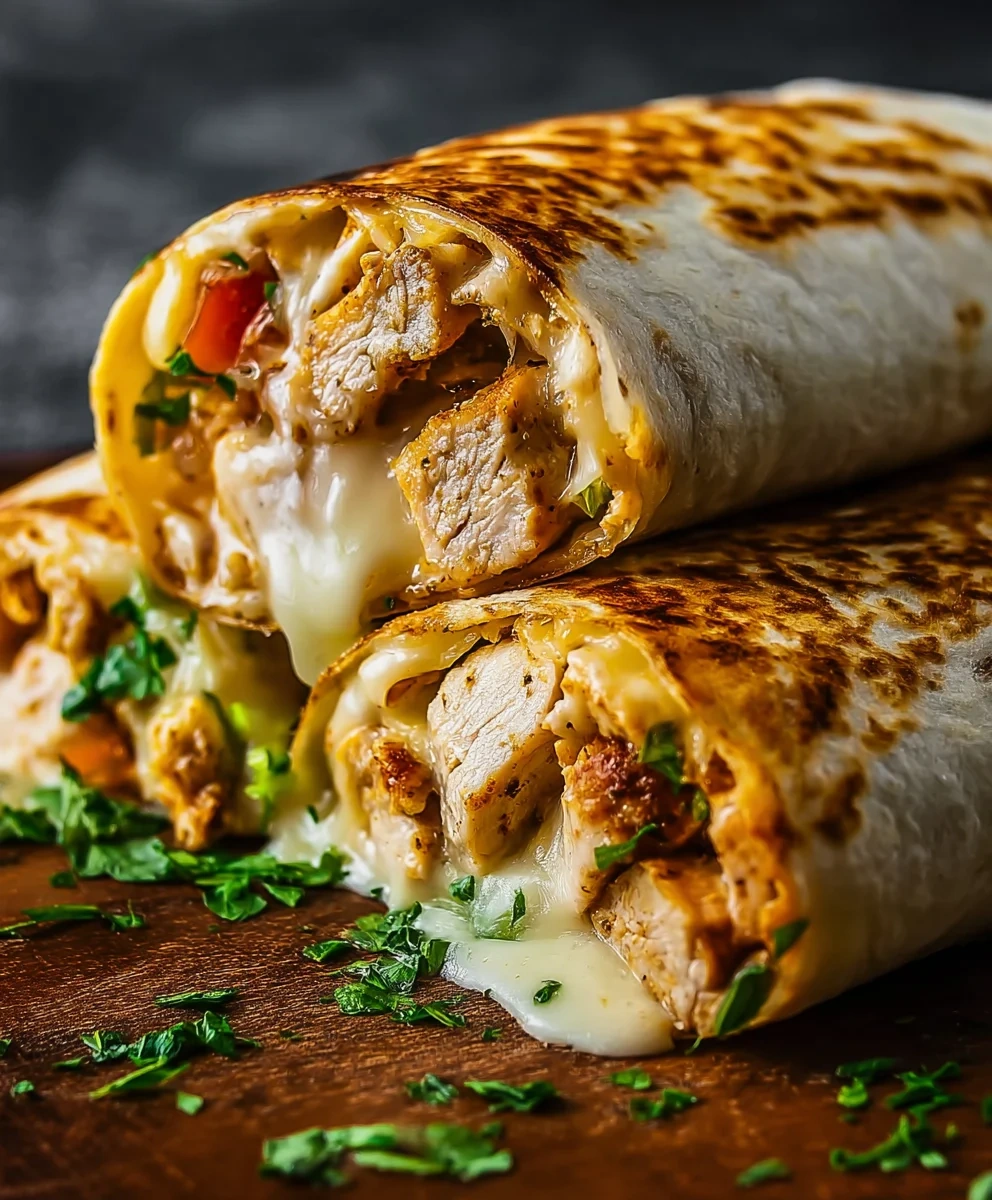
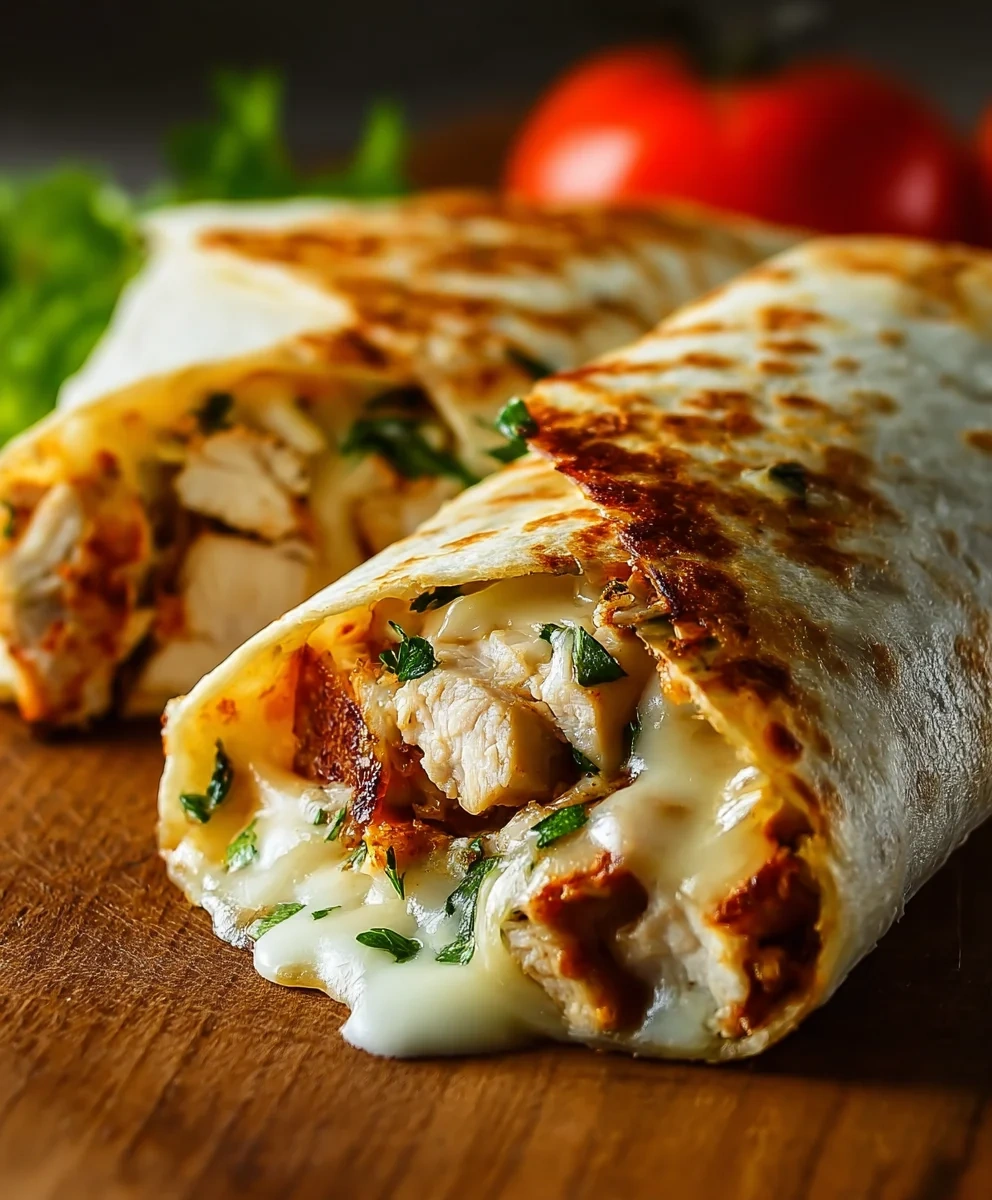
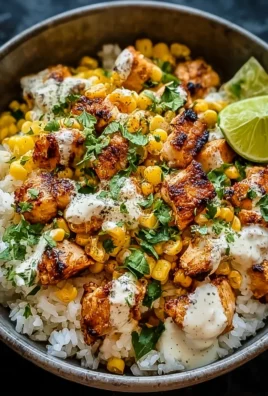
Transform weeknight dinners into a flavor-packed experience with these Cheesy Garlic Chicken Wraps. If you’re looking for a meal that’s quick, delicious, and sure to satisfy everyone at the table, this is it! This recipe mixes tender, shredded chicken with a creamy garlic aioli and loads of gooey cheddar cheese—all wrapped in a crispy tortilla. Whether it’s a busy Tuesday night or a fun family gathering, these wraps are perfect for any occasion.
What I love most about this recipe is how easy it is to prepare. You can whip it up in just 25 minutes, making it a fantastic option for those nights when you’re short on time but still want something special. Plus, they’re super versatile—you can add your favorite veggies or customize them to fit what you have on hand!
Why You’ll Love This Recipe
- Quick to prepare: With just 15 minutes of prep and 10 minutes of cooking, dinner will be ready in no time!
- Family-friendly: Kids and adults alike will love the cheesy goodness wrapped in a warm tortilla.
- Make-ahead convenience: Prep the filling ahead of time and assemble the wraps when you’re ready to eat.
- Endless customization: Add your favorite veggies or spices to make these wraps uniquely yours.
- Packed with flavor: The combination of garlic aioli and melted cheese creates an irresistible taste that everyone will enjoy.
Ingredients You’ll Need
Let’s gather some simple, wholesome ingredients to make these delicious Cheesy Garlic Chicken Wraps. You’ll find that each component contributes to the overall flavor and texture of the dish.
For the Filling
- 2 cups cooked chicken, shredded
- 1/2 cup garlic aioli
- 1 cup cheddar cheese, shredded
For Assembly
- 4 large tortillas
- Salt, to taste
- Freshly ground black pepper, to taste
Variations
This recipe is wonderfully flexible! Feel free to mix things up based on what you have at home or your personal preferences.
- Swap the protein: Use turkey, beef, or even chickpeas for a vegetarian option.
- Add extra veggies: Toss in some shredded lettuce, diced tomatoes, or thinly sliced bell peppers for added crunch.
- Change the cheese: Experiment with different cheeses like mozzarella or pepper jack for a spicy kick.
- Make it spicy: Add jalapeños or hot sauce if you like your wraps with a bit of heat.
How to Make Cheesy Garlic Chicken Wraps
Step 1: Prepare Chicken Filling
In a medium bowl, combine the shredded chicken with garlic aioli. Season it with salt and freshly ground black pepper to taste. Mixing these ingredients well is important because it ensures that all that delicious flavor gets evenly distributed throughout the filling.
Step 2: Warm Tortillas
Warm the tortillas one by one in a dry skillet over medium heat for about 15-20 seconds per side. You can also microwave them briefly (15-30 seconds for a stack) until soft. Warming them prevents cracks when rolling and makes them easier to work with.
Step 3: Assemble Wraps
Lay out a warm tortilla flat on your working surface. Spread a generous portion of the chicken and aioli mixture over the center, leaving about an inch clear around the edges. Top with about 1/4 cup of shredded cheddar cheese. This step allows you to customize each wrap—feel free to add any extra veggies here!
Step 4: Roll Wraps
Fold two opposite sides of the tortilla inward over the filling. Then, starting from the bottom edge closest to you, tightly roll it upwards while tucking in the filling as you go. This creates a snug cylinder that holds everything together beautifully!
Step 5: Optional: Toast Wraps for Melted Cheese
For an extra crunchy experience with gloriously melted cheese inside, place your rolled wraps back into a dry preheated skillet (or on a panini press) over medium heat. Cook them for 2-3 minutes per side until golden brown and crispy.
Step 6: Serve Immediately
Serve your Cheesy Garlic Chicken Wraps fresh from the skillet! They are best enjoyed warm and make for an absolutely delightful meal that’s sure to impress everyone at your table. Enjoy!
Pro Tips for Making Cheesy Garlic Chicken Wraps
These Cheesy Garlic Chicken Wraps are sure to be a hit, and with these pro tips, you can elevate your dish to the next level!
-
Use Fresh Ingredients: Fresh ingredients can make all the difference in flavor. Opt for fresh garlic aioli and quality chicken to enhance the wrap’s overall taste and aroma.
-
Don’t Overfill: It might be tempting to pack in as much filling as possible, but overfilling can lead to messy wraps that fall apart. Stick to the recommended amounts for a perfect roll every time.
-
Experiment with Cheese: While cheddar cheese is delicious, trying different varieties like pepper jack or mozzarella can add unique flavors and spice levels. Just make sure they melt well!
-
Customize Your Fillings: Feel free to get creative! Adding ingredients like roasted bell peppers or avocado can give your wraps a fresh twist while enhancing texture and flavor.
-
Serve Warm: These wraps taste best when served warm. If you’re making them ahead of time, consider reheating them briefly before serving to bring back that gooey cheese goodness.
How to Serve Cheesy Garlic Chicken Wraps
Serving these wraps is just as fun as making them! With a little creativity, you can turn a simple meal into a delightful dining experience.
Garnishes
- Chopped Fresh Herbs: A sprinkle of chopped parsley or cilantro adds vibrant color and freshness, making your dish more visually appealing.
- Lemon Wedges: Serving lemon wedges on the side allows guests to add a zesty kick that complements the richness of the cheese and aioli.
Side Dishes
-
Crispy Sweet Potato Fries: The sweetness and crunch of sweet potato fries offer a perfect contrast to the cheesy wraps. They are easy to prepare and loved by both kids and adults.
-
Simple Garden Salad: A refreshing garden salad with mixed greens, cucumbers, and a light vinaigrette balances the richness of the wraps perfectly.
-
Vegetable Sticks with Hummus: Crunchy veggies like carrots, celery, and bell peppers served with creamy hummus make for a healthy, crunchy side that adds variety to your meal.
-
Mexican Street Corn Salad: This corn salad is vibrant and packed with flavor, featuring sweet corn, lime juice, and cilantro—perfect for adding an extra burst of taste alongside your wraps.
With these tips and serving suggestions, your Cheesy Garlic Chicken Wraps will not only satisfy but also impress everyone at your table! Enjoy every delicious bite!
Make Ahead and Storage
These Cheesy Garlic Chicken Wraps are perfect for meal prep, allowing you to enjoy deliciousness throughout the week! Making them in advance not only saves time but also enhances their flavors. Here’s how to store and reheat your wraps effectively:
Storing Leftovers
- Let the wraps cool completely before storing.
- Place them in an airtight container.
- Store in the refrigerator for up to 3-4 days.
Freezing
- Wrap each individual wrap tightly in plastic wrap or aluminum foil.
- Place wrapped wraps into a freezer-safe bag or container.
- Freeze for up to 2-3 months for optimal freshness.
Reheating
- For refrigerated wraps, microwave for 30-60 seconds until heated through.
- For frozen wraps, thaw overnight in the fridge and then reheat similarly, or microwave directly from frozen, adding extra time as needed.
- Alternatively, heat in a skillet over medium heat until warmed and crispy.
FAQs
Here are some commonly asked questions about Cheesy Garlic Chicken Wraps:
Can I use leftover chicken for Cheesy Garlic Chicken Wraps?
Absolutely! Leftover chicken is perfect for this recipe. Just shred it and mix it with the garlic aioli as instructed.
What can I add to my Cheesy Garlic Chicken Wraps?
Feel free to customize your wraps with fresh veggies like lettuce, tomatoes, or onions for added flavor and crunch!
How do I make my Cheesy Garlic Chicken Wraps extra crispy?
To achieve a crispy texture, toast the assembled wraps in a dry skillet or panini press after rolling them up. This will give you that golden brown finish!
Final Thoughts
I hope you find joy in making these Cheesy Garlic Chicken Wraps! They’re not just quick and easy; they bring a comforting warmth that transforms any weeknight dinner into something special. Feel free to experiment with your favorite ingredients – they’re versatile and sure to please everyone at the table. Enjoy every bite, and happy cooking!
Cheesy Garlic Chicken Wraps
- Prep Time: 15 minutes
- Cook Time: 10 minutes
- Total Time: 25 minutes
- Yield: 4 servings 1x
- Category: Main
- Method: Cooking
- Cuisine: International
Ingredients
- 2 cups cooked chicken, shredded
- 1/2 cup garlic aioli
- 1 cup cheddar cheese, shredded
- 4 large tortillas
- Salt and pepper to taste
- Instructions:
Instructions
- In a medium bowl, combine the shredded chicken with garlic aioli. Season with salt and freshly ground black pepper to taste.
- Warm the tortillas in a dry skillet over medium heat for about 15-20 seconds per side or microwave for 15-30 seconds until soft.
- Lay out each warm tortilla and spread the chicken mixture over the center. Top with cheddar cheese and any additional veggies you desire.
- Fold the sides of the tortilla inward and roll tightly from the bottom edge to form a cylinder.
- For extra crunch, toast the rolled wraps in a skillet over medium heat for 2-3 minutes per side until golden brown.
- Serve immediately while warm.
- Helpful Notes:
Nutrition
- Serving Size: 1 wrap (approximately 200g)
- Calories: 410
- Sugar: 1g
- Sodium: 750mg
- Fat: 22g
- Saturated Fat: 10g
- Unsaturated Fat: 10g
- Trans Fat: 0g
- Carbohydrates: 34g
- Fiber: 2g
- Protein: 24g
- Cholesterol: 75mg
Leave a Comment