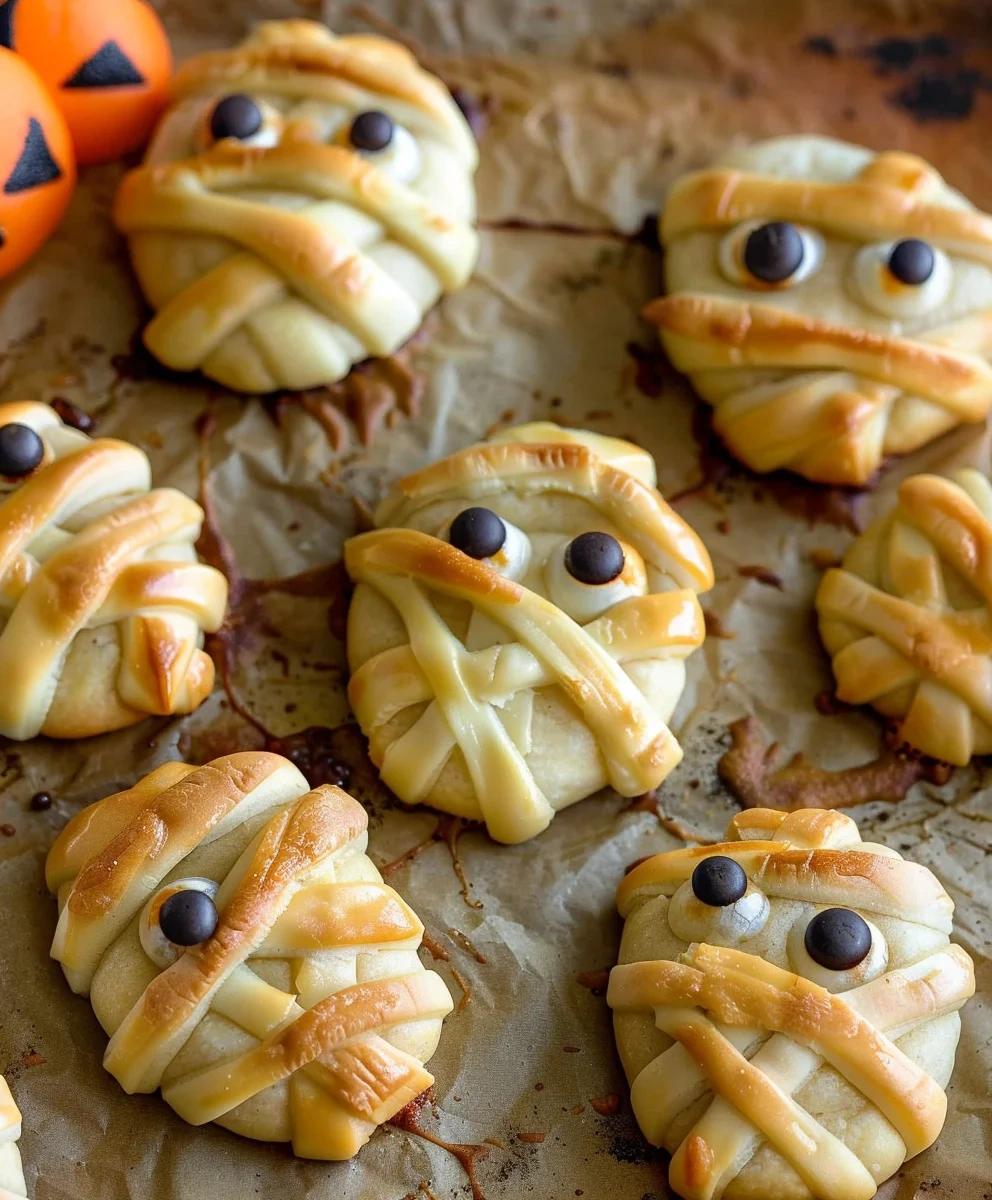
If you’re looking for a fun and delicious way to impress your friends or family, these Baked Cheese Mummies are just what you need! They’re perfect for festive gatherings, Halloween parties, or even a cozy movie night at home. This recipe brings together the joy of playful presentation and mouthwatering flavor—who could resist warm, gooey cheese wrapped in flaky pastry? Plus, they’re easy to make, allowing you to spend more time enjoying the moment rather than slaving away in the kitchen.
I remember the first time I made these Baked Cheese Mummies; they were an instant hit! Everyone gathered around, eager to grab one and see how delightful they looked. With their whimsical design and cheesy goodness, these treats are sure to become a favorite in your household too.
Why You’ll Love This Recipe
- Super Easy to Make: With just a few simple steps, you’ll have these delightful mummies ready in no time!
- Family-Friendly Fun: Kids love helping out with wrapping the cheese and decorating them with candy eyes.
- Perfect for Any Occasion: Whether it’s a festive celebration or just a regular weeknight dinner, these mummies fit right in.
- Deliciously Cheesy: Who can resist the combination of stretchy cheese and crispy pastry? It’s comfort food at its best!
- Make-Ahead Option: You can assemble the mummies ahead of time and bake them just before serving for warm, fresh treats.
Ingredients You’ll Need
These Baked Cheese Mummies are made with simple, wholesome ingredients that you likely have on hand. Let’s gather what we need to create this adorable dish!
- 2 sheets thawed puff pastry
- 14 Mini Babybel® cheeses (wax removed)
- 1/3 cup honey or your favorite jam (optional, for serving)
- 1 large egg, beaten with 1 teaspoon water (for egg wash)
- 28 candy eyes or mini chocolate chips (for decorating)
Variations
The beauty of this recipe lies in its flexibility! You can easily tweak it to suit your taste or what you have available. Here are some fun variations:
- Try different cheeses: Swap Mini Babybel® cheeses for other types like cheddar or gouda for a different flavor profile.
- Add spices: Sprinkle some garlic powder or Italian herbs into the egg wash for an extra kick of flavor.
- Go sweet: Instead of savory pastry wraps, drizzle some honey over everything before baking for a sweet twist.
- Mix up the decorations: Use colored icing instead of candy eyes for a creative touch that kids will love!
How to Make Baked Cheese Mummies
Step 1: Preheat Your Oven
Preheating your oven is the first important step. Set it to 375°F (190°C) so that it’s hot and ready when you’re done assembling your mummies. This ensures even baking and that golden brown finish we all crave!
Step 2: Prepare the Puff Pastry
Thaw your puff pastry sheets according to package directions. Gently unroll them onto a clean work surface. The lightness of puff pastry will make your mummies flaky and delicious once baked!
Step 3: Cut the Pastry Strips
Using a pizza cutter or sharp knife, cut each puff pastry sheet lengthwise into 7-8 long strips about ½ inch wide. These strips will wrap around our cheese like mummy bandages—how fun is that?
Step 4: Remove Wax from Cheese
Carefully remove the red wax coating from each Mini Babybel® cheese. This step is essential as we want that creamy cheese filling exposed and ready to get melty inside its pastry wrap!
Step 5: Wrap Each Cheese
Take one Babybel cheese and start wrapping it with a pastry strip from one end. Overlap slightly but leave a small gap near the top for its ‘face.’ Remember not to wrap too tightly; we want some room so that steam can escape during baking!
Step 6: Arrange on Baking Sheet
Place each assembled cheese mummy onto your prepared baking sheet. Make sure there’s enough space between them—about 1-2 inches—to allow them to puff up beautifully while baking.
Step 7: Prepare Egg Wash
In a small bowl, whisk together one large egg and one teaspoon of water to create an egg wash. Lightly brush this mixture over the tops of each mummy; it adds that lovely golden sheen we all adore.
Step 8: Bake Until Golden
Bake your mummies in the preheated oven for about 12-15 minutes. Keep an eye on them; you’ll know they’re done when they’re puffed up and golden brown with melted cheese inside!
Step 9: Cool Before Decorating
Once baked, carefully remove them from the oven and let them cool slightly on the sheet for about 2-3 minutes. This helps prevent burns while you decorate!
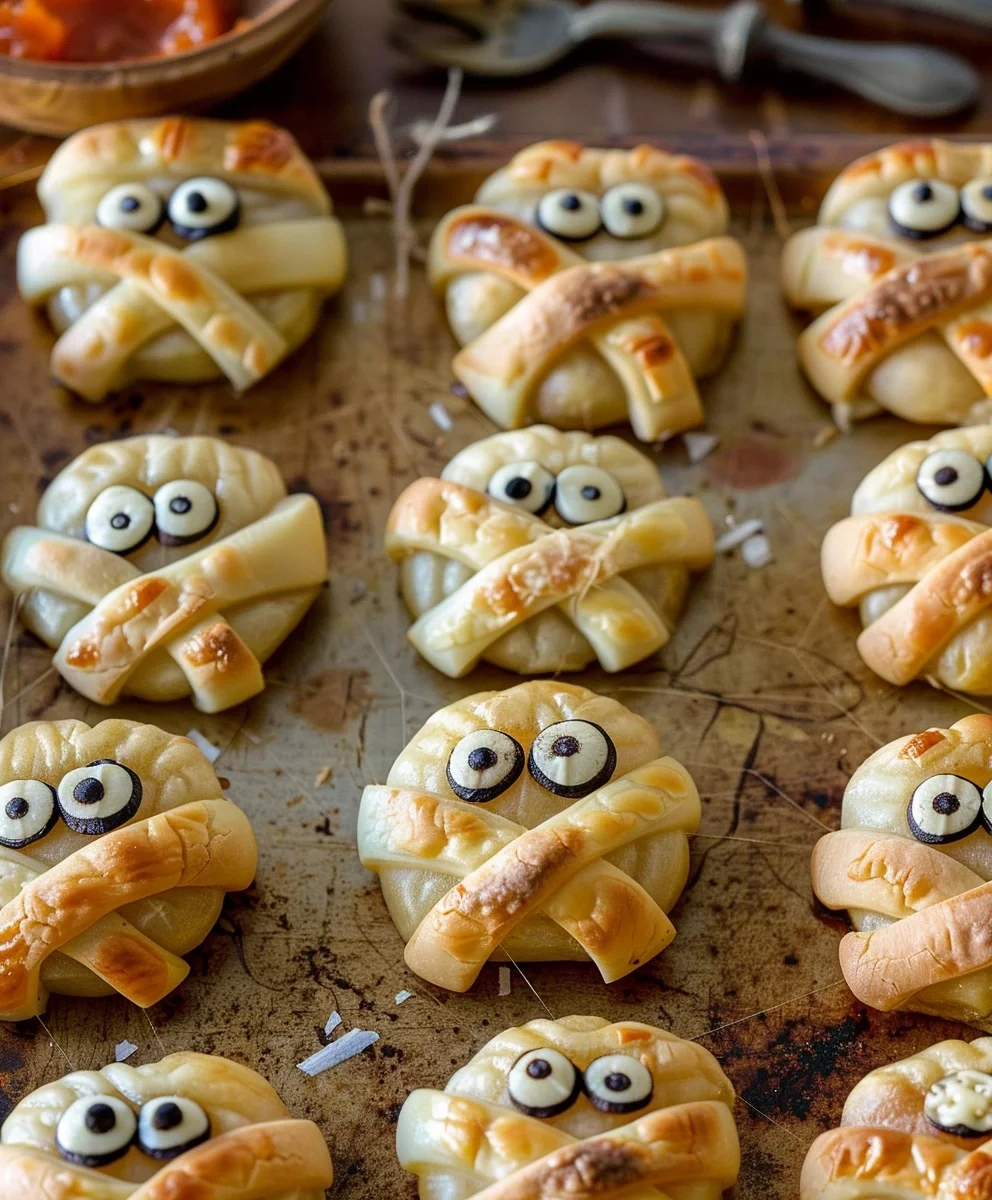
Step 10: Add Candy Eyes
While still warm, place two candy eyes or mini chocolate chips onto each mummy’s exposed ‘face.’ This is where they come alive—so much fun!
Step 11: Serve Warm & Enjoy!
Finally, serve your Baked Cheese Mummies warm! Drizzle them with honey or your favorite jam if desired. Gather everyone around and enjoy these delightful treats together!
Pro Tips for Making Baked Cheese Mummies
Creating these delightful Baked Cheese Mummies is a breeze, especially with a few handy tips to ensure they turn out perfectly!
-
Use cold puff pastry: Starting with cold pastry makes it easier to handle and helps achieve that flaky texture when baked. Warm pastry can become sticky and difficult to work with.
-
Don’t wrap too tightly: Leaving some space when wrapping the cheese allows the puff pastry to expand while baking, resulting in a beautifully puffy mummy instead of a flattened one.
-
Monitor baking time: Every oven is different, so keep an eye on your mummies as they bake. You want them golden brown and puffed but not burnt!
-
Experiment with fillings: While Mini Babybel® cheese is delicious, feel free to try other cheeses or even fillings like spinach or mushrooms for added flavor. Just ensure they melt well.
-
Make ahead: You can assemble the mummies a few hours in advance and store them in the refrigerator until you’re ready to bake. This makes party prep easier!
How to Serve Baked Cheese Mummies
These playful Baked Cheese Mummies are not only fun to eat but also make for an eye-catching presentation at any gathering. With just a few creative touches, you can elevate their appeal even further.
Garnishes
- Fresh herbs: A sprinkle of chopped parsley or chives adds a pop of color and freshness that contrasts nicely with the warm, cheesy mummies.
- Sour cream or yogurt dip: Serve with a side of tangy dip for added flavor. A dollop of herb-infused yogurt pairs beautifully with the richness of the cheese.
Side Dishes
- Crunchy vegetable platter: Pair your mummies with an assortment of fresh veggies like carrots, cucumbers, and bell peppers for a refreshing contrast. Serve them with hummus for dipping!
- Mixed greens salad: A light salad dressed with vinaigrette complements the richness of the mummies. Toss in some cherry tomatoes and sliced almonds for added texture.
- Sweet potato fries: The natural sweetness of sweet potato fries balances out the savory flavors of the mummies beautifully. Plus, they’re always a hit!
- Spicy popcorn: For a fun twist, serve your mummies alongside spicy popcorn seasoned with chili powder or nutritional yeast. It’s a crunchy treat that will keep guests coming back for more!
Enjoy presenting your Baked Cheese Mummies as part of a festive spread that everyone will love!
Make Ahead and Storage
These Baked Cheese Mummies are perfect for meal prep! You can make them ahead of time to enjoy later, making entertaining or snack time super convenient.
Storing Leftovers
- Place any uneaten mummies in an airtight container.
- Keep them in the refrigerator for up to 3 days.
- Reheat in the oven for a few minutes to regain their crispy texture.
Freezing
- Assemble the mummies but do not bake them.
- Place them on a baking sheet and freeze until solid.
- Transfer to a freezer-safe bag or container and store for up to 2 months.
Reheating
- Preheat your oven to 375°F (190°C).
- Bake frozen mummies directly from the freezer for about 15-20 minutes, or until golden and heated through.
- For refrigerated mummies, reheat for about 10 minutes until warm and crispy.
FAQs
If you’re curious about these delightful treats, you’ve come to the right place! Here are some frequently asked questions:
Can I make Baked Cheese Mummies with different types of cheese?
Absolutely! While Mini Babybel® cheese works wonderfully, feel free to try other cheeses like mozzarella balls or cheddar. Just ensure they melt well!
How do I serve Baked Cheese Mummies at a party?
These mummies are best served warm. You can place them on a platter with a side of honey or jam for dipping. They add a fun touch to any gathering!
Can Baked Cheese Mummies be made vegan?
Yes! You can substitute the cheese with dairy-free alternatives and use plant-based egg wash made from water mixed with ground flaxseed or aquafaba.
What occasions are perfect for Baked Cheese Mummies?
These delicious bites are great for Halloween parties, game day snacks, or family movie nights. They bring a playful vibe to any occasion!
Final Thoughts
I hope you find joy in making these charming Baked Cheese Mummies! They combine fun with flavor, making them a sure hit at any gathering. Don’t hesitate to experiment with different cheeses or dips—make it your own! I’m excited for you to enjoy this recipe as much as I do. Happy cooking!
Baked Cheese Mummies

- Prep Time: 20 minutes
- Cook Time: 15 minutes
- Total Time: 35 minutes
- Category: Main
- Method: Cooking
- Cuisine: International
Ingredients
- 2 sheets thawed puff pastry
- 14 Mini Babybel® cheeses (wax removed)
- 1/3 cup honey or your favorite jam (optional, for serving)
- 1 large egg, beaten with 1 teaspoon water (for egg wash)
- 28 candy eyes or mini chocolate chips (for decorating)
- Instructions:
Instructions
- Preheat your oven to 375°F (190°C).
- Thaw and unroll puff pastry sheets on a clean surface.
- Cut each sheet into 7-8 strips, about ½ inch wide.
- Remove the wax from each Babybel cheese.
- Wrap each cheese with a pastry strip, leaving space at the top for decoration.
- Arrange mummies on a baking sheet with space between each one.
- Brush tops with egg wash for a golden finish.
- Bake for 12-15 minutes until puffed and golden brown.
- Cool slightly before adding candy eyes.
- Serve warm with honey or jam if desired.
- Helpful Notes:
Nutrition
- Serving Size: 1 serving
- Calories: 148
- Sugar: 0g
- Sodium: 220mg
- Fat: 10g
- Saturated Fat: 4g
- Unsaturated Fat: 6g
- Trans Fat: 0g
- Carbohydrates: 10g
- Fiber: 0g
- Protein: 4g
- Cholesterol: 30mg


Leave a Comment