If you’re looking for a delicious yet healthy dinner option, I’ve got just the recipe for you! These Baked Chicken Tenders: A Crispy & Healthy Recipe are a family favorite in my house. Juicy chicken strips with a crispy panko coating make for a dish that everyone loves. Whether it’s a busy weeknight or a cozy family gathering, these tenders are versatile enough to fit any occasion.
What makes this recipe so special is not only its mouthwatering flavor but also how easy it is to prepare! You can whip these up in no time, and they’re perfect for dipping into your favorite sauces or serving alongside a fresh salad. Trust me, once you try them, they’ll become a go-to meal!
Why You’ll Love This Recipe
- Quick Preparation: With just a few simple steps, you can have these tenders ready to bake in under 30 minutes!
- Family-Friendly Appeal: Everyone from kids to adults will enjoy these tasty bites—perfect for picky eaters!
- Make-Ahead Convenience: Marinate the chicken ahead of time and pop them in the oven when you’re ready to eat.
- Healthy Alternative: Baked instead of fried means less oil and lower calories without sacrificing crunch.
- Delicious Flavor: The combination of spices and Parmesan cheese creates an irresistible taste that keeps you coming back for more.
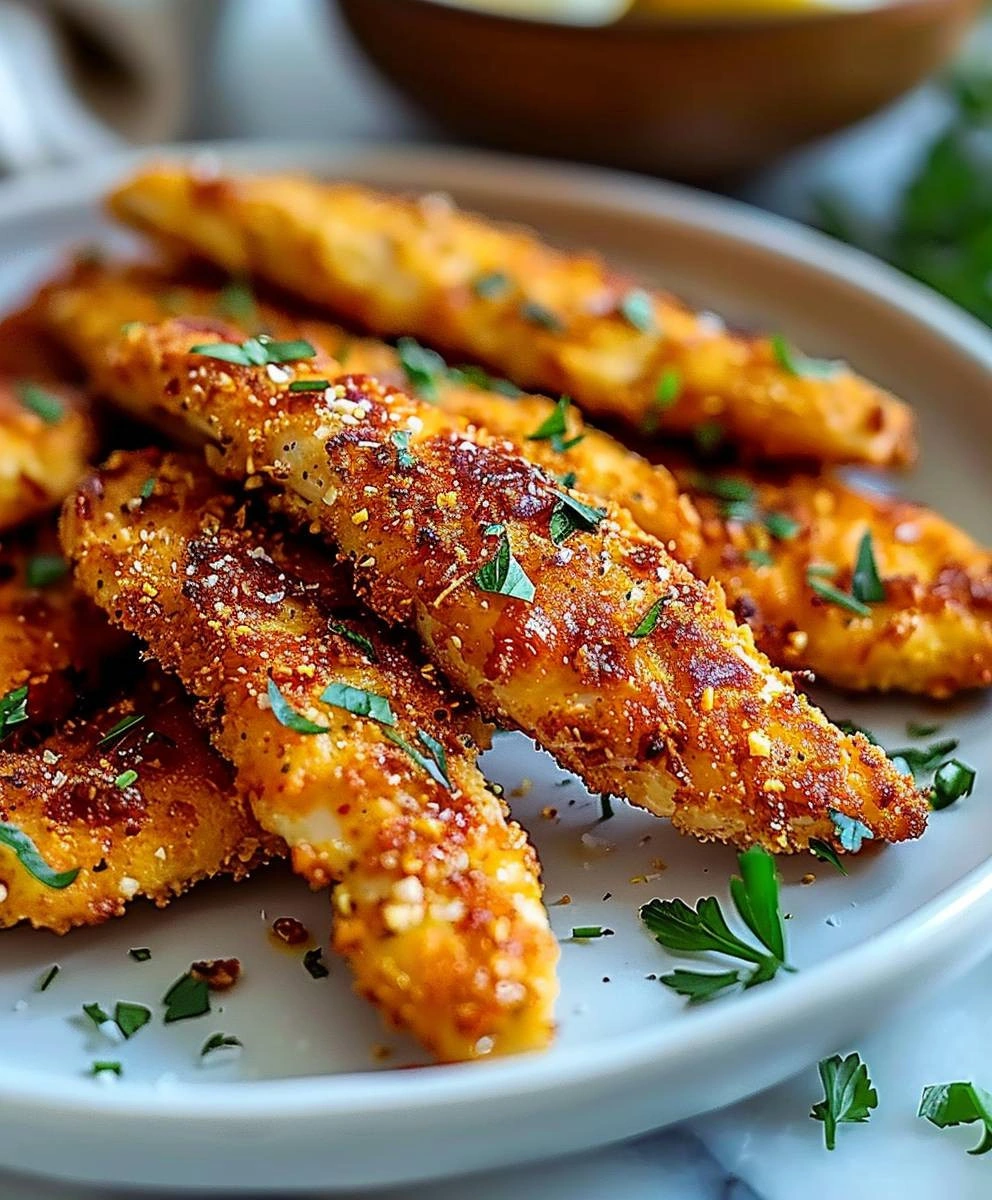
Ingredients You’ll Need
To make these delightful baked chicken tenders, you’ll need some simple and wholesome ingredients. Each one plays a role in creating that delicious flavor and crispy texture we adore. Here’s what you’ll need:
For the Chicken Tenders
- 1.5 lbs boneless, skinless chicken breasts
- 1 cup all-purpose flour
- 1 teaspoon paprika
- 1 teaspoon garlic powder
- 1 teaspoon onion powder
- 1/2 teaspoon salt
- 1/2 teaspoon black pepper
- 1/4 teaspoon cayenne pepper (optional)
- 1/2 cup buttermilk
- 1/2 cup milk
- 1 large egg, lightly beaten
- 1 cup panko bread crumbs
- 1/2 cup grated Parmesan cheese
- 1/4 cup olive oil
- Cooking spray
Variations
This recipe is wonderfully flexible, allowing you to customize it based on your preferences or what you have on hand. Here are some fun ideas to switch things up:
- Swap the protein: Try using turkey or tofu strips instead of chicken for a different take.
- Change the seasoning: Experiment with different spices like Italian seasoning or Cajun spice for added zest.
- Go gluten-free: Substitute all-purpose flour with almond flour or coconut flour and use gluten-free panko bread crumbs.
- Add some crunch: Toss in some chopped nuts or seeds into the panko mixture for an extra layer of texture.
How to Make Baked Chicken Tenders: A Crispy & Healthy Recipe
Step 1: Preheat Your Oven
Start by preheating your oven to 400°F (200°C). This ensures that your chicken tenders will bake evenly and reach that perfect golden brown color.
Step 2: Prepare the Chicken Strips
Cut the boneless chicken breasts into 1-inch thick strips that are about 2-3 inches long. Gently pound them to an even thickness; this helps them cook evenly and stay juicy inside!
Step 3: Marinate the Chicken
In a shallow dish, whisk together the buttermilk and milk. Place your chicken strips in this mixture and let them marinate for at least 30 minutes (the longer, the better!). This step adds moisture and flavor, making your tenders incredibly juicy.
Step 4: Combine Dry Ingredients
In another shallow dish, mix together the flour, paprika, garlic powder, onion powder, salt, black pepper, and cayenne pepper if you’re feeling adventurous. This dry coating will give your tenders their flavorful base.
Step 5: Prepare the Panko Mixture
In a third shallow dish, combine panko bread crumbs with grated Parmesan cheese. This crunchy mixture adds an irresistible crispiness once baked.
Step 6: Bread the Chicken Tenders
Take each marinated chicken strip out of the buttermilk mixture and let any excess drip off. First, dredge it in the flour mixture until it’s well-coated. Then dip it into the panko mixture, pressing gently to make sure it sticks nicely.
Step 7: Arrange on Baking Sheet
Place the breaded chicken tenders on a parchment-lined baking sheet. Make sure they’re spaced apart so they can crisp up beautifully in the oven.
Step 8: Spray for Extra Crispiness
Lightly spray your tenders with cooking spray—this will help achieve that gorgeous golden color during baking while keeping them healthier than frying.
Step 9: Bake Until Perfectly Cooked
Bake your chicken tenders for about 20-25 minutes until they are cooked through (you want an internal temperature of 165°F or 74°C). For an extra crispy finish, broil them for just a few seconds during the last five minutes—watch carefully so they don’t burn!
Step 10: Let Them Rest Before Serving
Once out of the oven, let your baked chicken tenders rest for a few minutes before diving in. This allows juices to settle back into the meat—making every bite tender and flavorful!
And there you have it—a loveable recipe for Baked Chicken Tenders that’s sure to please anyone at your table! Enjoy!
Pro Tips for Making Baked Chicken Tenders: A Crispy & Healthy Recipe
Creating the perfect baked chicken tenders is all about those little details that make a big difference! Here are some tips to help you achieve that crispy, golden perfection.
-
Marinate Longer for Juicier Chicken: While 30 minutes will do, marinating your chicken tenders for a few hours or even overnight can infuse them with more flavor and moisture, ensuring each bite is tender and juicy.
-
Use Panko for Extra Crunch: Opting for panko bread crumbs instead of regular bread crumbs gives your tenders a delightful crunch. Panko is lighter and larger, which allows for more air to circulate during baking, resulting in an extra crispy coating.
-
Don’t Skip the Cooking Spray: Lightly spraying the breaded tenders with cooking spray before baking helps achieve that beautiful golden color and crispiness without adding too much fat. It’s a simple step that makes a noticeable difference!
-
Broil at the End for Crispiness: If you want to take your tenders to the next level, turn on the broiler for the last few minutes of baking. Just be sure to keep an eye on them to prevent burning – it’s worth it for that extra crunch!
-
Check Internal Temperature: Always use a meat thermometer to ensure your chicken is cooked through. The internal temperature should reach 165°F (74°C). This guarantees food safety while keeping your chicken moist and perfectly cooked.
How to Serve Baked Chicken Tenders: A Crispy & Healthy Recipe
Presentation matters! Serving your baked chicken tenders with style can make all the difference at your dining table. Here are some delightful ideas on how to present this dish beautifully.
Garnishes
-
Fresh Parsley: A sprinkle of freshly chopped parsley adds a pop of color and freshness, enhancing both the look and flavor of your dish.
-
Lemon Wedges: Serve with lemon wedges on the side; a squeeze of lemon juice elevates the taste and adds a zesty brightness that complements the savory chicken.
Side Dishes
-
Crispy Sweet Potato Fries: Perfectly baked sweet potato fries provide a delicious sweetness that balances out the savory flavors of the tenders, making for an irresistible combination.
-
Caesar Salad (Dairy-Free): A fresh Caesar salad made with crisp romaine lettuce, creamy dairy-free dressing, and crunchy croutons pairs wonderfully with chicken tenders, offering a refreshing contrast.
-
Steamed Broccoli: Bright green steamed broccoli is not only nutritious but adds color to your plate. Drizzle with olive oil and sprinkle with salt for simple yet tasty flavor enhancement.
-
Quinoa Salad: A light quinoa salad mixed with cherry tomatoes, cucumber, and parsley provides a nutritious side packed with protein and fiber—perfect for complementing those crispy chicken tenders!
Now you’re ready to serve up these delectable baked chicken tenders like a pro! Enjoy gathering friends and family around the table as they savor every bite.
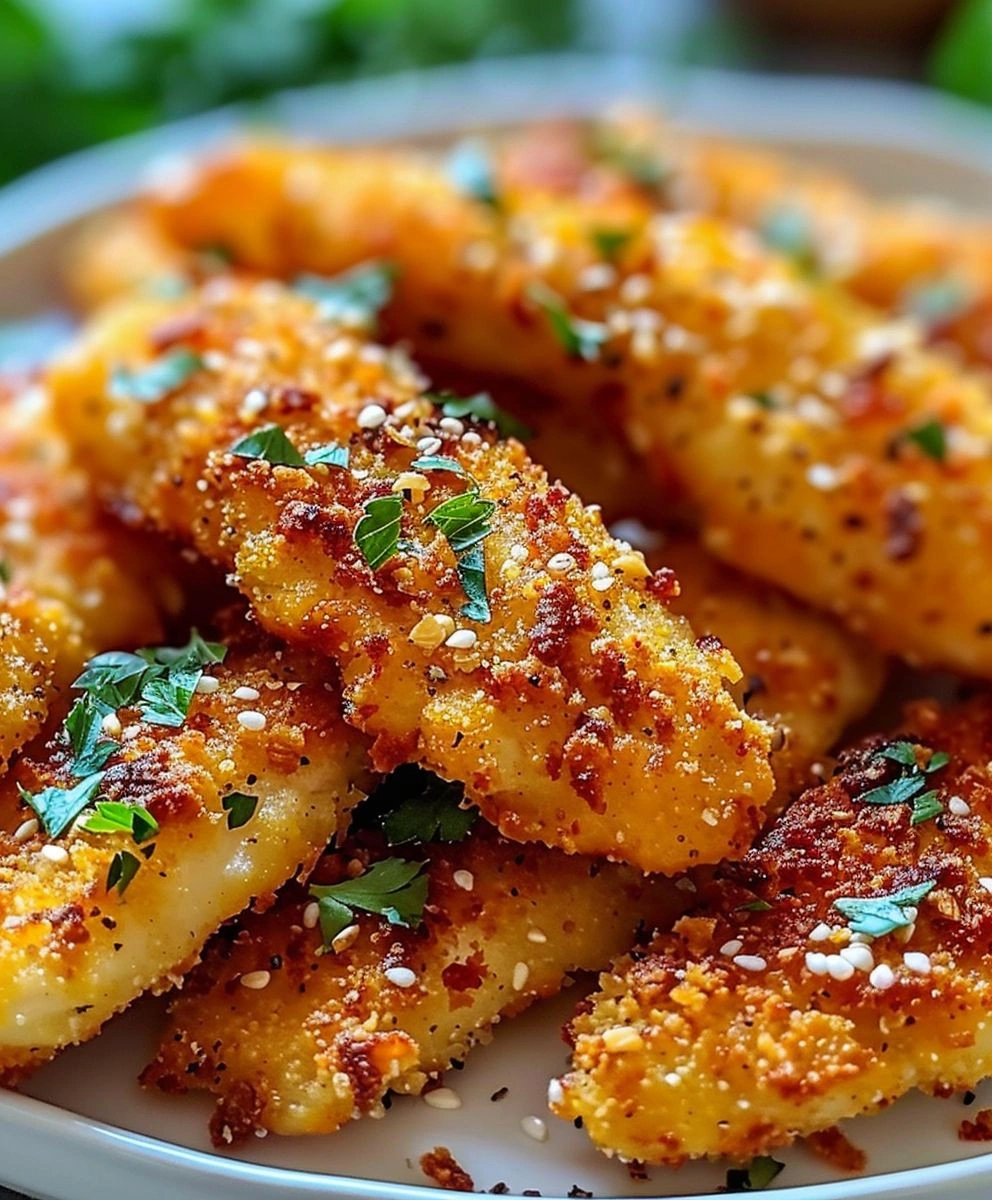
Make Ahead and Storage
This Baked Chicken Tenders recipe is perfect for meal prep, allowing you to enjoy delicious and healthy tenders throughout the week. Preparing them in advance makes it easy to grab a quick meal or snack whenever hunger strikes.
Storing Leftovers
- Store any leftover baked chicken tenders in an airtight container in the refrigerator.
- They will stay fresh for up to 3 days.
- To keep the breading crispy, consider placing a paper towel at the bottom of the container to absorb moisture.
Freezing
- Allow baked chicken tenders to cool completely before freezing.
- Place them in a single layer on a baking sheet and freeze for 1-2 hours until solid.
- Transfer the frozen tenders to a freezer-safe bag or container, removing as much air as possible. They can be stored for up to 3 months.
Reheating
- For best results, reheat chicken tenders in the oven at 375°F (190°C) for about 10-15 minutes until warmed through and crispy.
- Alternatively, you can reheat them in an air fryer at 350°F (175°C) for about 5-7 minutes.
- Avoid using the microwave, as it may make the breading soggy.
FAQs
Here are some common questions you might have about making Baked Chicken Tenders.
Can I use chicken thighs instead of chicken breasts for this recipe?
Absolutely! Chicken thighs can be used for added juiciness and flavor. Just adjust the cooking time slightly if needed.
How do I make Baked Chicken Tenders: A Crispy & Healthy Recipe gluten-free?
To make this recipe gluten-free, substitute all-purpose flour with almond flour or a gluten-free flour blend. Ensure your panko breadcrumbs are also gluten-free.
Can I prepare Baked Chicken Tenders ahead of time?
Yes! You can marinate and bread the chicken tenders in advance. Simply store them in the fridge until you’re ready to bake them.
What dipping sauces go well with Baked Chicken Tenders?
These tenders pair perfectly with honey mustard, BBQ sauce, or ranch dressing. Feel free to get creative with your favorite sauces!
Final Thoughts
I hope you enjoy making these Baked Chicken Tenders as much as I do! They’re not just crispy and delicious; they also offer a healthier alternative to traditional fried chicken. Whether you’re whipping them up for a family dinner or meal prepping for busy days ahead, these tenders are sure to become a favorite. Happy cooking, and I can’t wait for you to try this delightful recipe!
Dinner
Baked Chicken Tenders: A Crispy & Healthy Recipe
- Prep Time: 30 minutes
- Cook Time: 25 minutes
- Total Time: 55 minutes
- Category: Main
- Method: Cooking
- Cuisine: International
Ingredients
- 1.5 lbs boneless, skinless chicken breasts
- 1 cup all-purpose flour
- 1 teaspoon paprika
- 1 teaspoon garlic powder
- 1/2 cup buttermilk
- 1 cup panko bread crumbs
- 1/2 cup grated Parmesan cheese
- Olive oil (for drizzling)
- Preparation Instructions:
Instructions
- Preheat your oven to 400°F (200°C).
- Cut chicken breasts into strips and pound to an even thickness.
- Marinate chicken in buttermilk for at least 30 minutes.
- In one dish, combine flour, paprika, garlic powder, salt, and pepper.
- In another dish, mix panko breadcrumbs and Parmesan cheese.
- Coat each chicken strip first in flour mixture, then in panko mixture.
- Arrange on a baking sheet lined with parchment paper.
- Lightly spray with cooking spray and bake for 20-25 minutes until golden.
- Helpful Notes:
Nutrition
- Serving Size: 4 oz (113g)
- Calories: 250
- Sugar: 2g
- Sodium: 540mg
- Fat: 9g
- Saturated Fat: 2g
- Unsaturated Fat: 7g
- Trans Fat: 0g
- Carbohydrates: 29g
- Fiber: 2g
- Protein: 18g
- Cholesterol: 75mg


Leave a Comment